古卷轴展开动画
2024-10-12
661 字约 3 分钟
...本文主要介绍了古卷轴展开动画的实现,包括 jquery 版本和 react 版本,还实现了从中间展开的动画效果和从右向左展开的动画效果。
当然,还可以结合古诗词淡入淡出动画效果,实现古诗词淡入动画和古画卷展开动画的组合效果。
jquery 版本
在网上找了一个 jquery 版本的实现,具体 demo 可以查看下列网址:古卷轴平滑打开 jQuery 动画特效
动画实现代码如下所示,直接从 demo 中复制过来,直接使用即可。
$(document).ready(function () {
$(".l-pic-index").animate({ left: "95px", top: "-4px" }, 1300);
$(".r-pic-index").animate({ right: "-23px", top: "-5px" }, 1450);
$(".l-bg-index").animate({ width: "433px", left: "73px" }, 1500);
$(".r-bg-index").animate(
{ width: "433px", right: "-38px" },
1500,
function () {
$(".main-index").fadeIn(800);
}
);
});
react 版本
上述是用 jquery 实现的版本,但是一般现在开发都用 vue 和 react 框架了,不使用 jquery 了。
我的项目是使用 react 开发的,因此使用 react 重构一下,在 react 项目中实现该功能,整体而言,调整的东西也不多。
1. 初始状态:两个卷轴
固定初始状态的位置:只显示两个卷轴,画卷和内容部分不显示
function Page() {
return (
<div className="reel_content">
<div className="l-pic-index"></div>
<div className="r-pic-index"></div>
<div className="l-bg-index"></div>
<div className="r-bg-index"></div>
<div className="main-index">
<p className="intro-text">xxx</p>
</div>
</div>
);
}
export default Page;
.reel_content {
position: relative;
z-index: 99;
width: 900px;
height: 460px;
padding: 40px 0;
background-color: #6f0b02;
box-sizing: border-box;
.l-pic-index {
position: absolute;
left: 400px;
top: 1px;
z-index: 2;
width: 50px;
height: 460px;
background: url("../img/j1.png") no-repeat right 0;
}
.r-pic-index {
position: absolute;
right: 400px;
top: 0;
z-index: 2;
width: 50px;
height: 460px;
background: url("../img/j4.png") no-repeat left 0;
}
.l-bg-index {
position: absolute;
top: -3px;
left: 430px;
z-index: 1;
width: 25px;
height: 459px;
background: url("../img/j2.png") right 0 no-repeat;
}
.r-bg-index {
position: absolute;
top: -4px;
right: 430px;
z-index: 1;
width: 25px;
height: 459px;
background: url("../img/j3.png") 0 0 no-repeat;
}
.main-index {
display: none;
overflow: hidden;
zoom: 1;
position: absolute;
z-index: 5;
width: 530px;
height: 280px;
left: 145px;
top: 90px;
color: #2e2e2e;
}
}
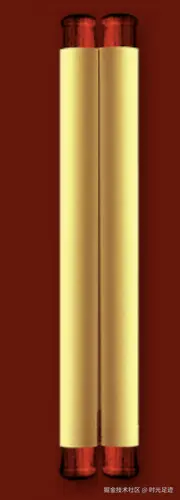
初始状态效果如下所示:
2. 结束状态:全部展开
固定所有内容的位置,显示卷轴中部和内容部分
.reel_content_finish {
.l-pic-index {
left: 95px !important;
top: -4px !important;
}
.r-pic-index {
right: -23px !important;
top: -5px !important;
}
.l-bg-index {
width: 433px !important;
left: 73px !important;
}
.r-bg-index {
width: 433px !important;
right: -38px !important;
}
.main-index {
display: block !important;
}
}

结束状态效果如下所示:

3. 卷轴展开:中间展开
将 jquery 版本的动画效果代码,转换一下为 react 的,如下所示:
function Page() {
const [isAnimating, setIsAnimating] = useState(false);
const [mainIndexStyle, setMainIndexStyle] = useState({ display: "none" });
const [lPicIndexStyle, setLPicIndexStyle] = useState({});
const [rPicIndexStyle, setRPicIndexStyle] = useState({});
const [lBgIndexStyle, setLBgIndexStyle] = useState({});
const [rBgIndexStyle, setRBgIndexStyle] = useState({});
const [mainIndexVisible, setMainIndexVisible] = useState(false);
useEffect(() => {
const intervalId = setInterval(() => {
setIsAnimating(true);
}, 3000);
return () => clearInterval(intervalId);
}, []);
useEffect(() => {
if (isAnimating) {
animateElements();
}
}, [isAnimating]);
useEffect(() => {
if (mainIndexVisible) {
setTimeout(() => {
setMainIndexStyle({ display: "block" });
}, 800);
}
}, [mainIndexVisible]);
const animateElements = () => {
const lPicIndexStyle = {
left: "95px",
top: "-4px",
transition: "left 1300ms, top 1300ms",
};
const rPicIndexStyle = {
right: "-23px",
top: "-5px",
transition: "right 1450ms, top 1450ms",
};
const lBgIndexStyle = {
width: "433px",
left: "73px",
transition: "width 1500ms, left 1500ms",
};
const rBgIndexStyle = {
width: "433px",
right: "-38px",
transition: "width 1500ms, right 1500ms",
};
setTimeout(() => {
setMainIndexVisible(true);
setTimeout(() => {
resetAnimations();
}, 3000);
}, 1500);
setLPicIndexStyle(lPicIndexStyle);
setRPicIndexStyle(rPicIndexStyle);
setLBgIndexStyle(lBgIndexStyle);
setRBgIndexStyle(rBgIndexStyle);
};
const resetAnimations = () => {
setMainIndexVisible(false);
setMainIndexStyle({ display: "none" });
setLPicIndexStyle({});
setRPicIndexStyle({});
setLBgIndexStyle({});
setRBgIndexStyle({});
setIsAnimating(false);
};
return (
<div className="reel_content">
<div className="l-pic-index" style={{ ...lPicIndexStyle }}></div>
<div className="r-pic-index" style={{ ...rPicIndexStyle }}></div>
<div className="l-bg-index" style={{ ...lBgIndexStyle }}></div>
<div className="r-bg-index" style={{ ...rBgIndexStyle }}></div>
<div className="main-index" style={{ ...mainIndexStyle }}>
<p className="intro-text">xxx</p>
</div>
</div>
);
}
export default memo(Page);
我的版本(右向左展开)
上述实现的实现的版本是:从中间向两边展开的。不满足项目需求,所以需要修改。
而且上述的实现代码太复杂、太繁琐了,需要简化一下,直接使用 CSS3 动画就行了。

我的项目需求为:卷轴滚动时,从右向左打开,并且同步出现诗句
前提条件:将图片 j2.png 和 j3.png 合并成一张完整的图片
精简的代码,如下所示:
function Page() {
const [isAnimating, setIsAnimating] = useState(false);
const [reelClass, setReelClass] = useState("reel_wrap");
useEffect(() => {
const intervalId = setTimeout(() => {
setIsAnimating(true);
}, 3000);
return () => clearTimeout(intervalId);
}, []);
useEffect(() => {
if (isAnimating) {
setReelClass("reel_wrap reel_wrap_finish");
}
}, [isAnimating]);
return (
<div className={reelClass}>
<div className="reel_l"></div>
<div className="reel_r"></div>
<div className="reel_bg"></div>
</div>
);
}
export default memo(Page);
样式实现:
$reelWidth: 48px;
$reelHeight: 384px;
$reelBgWidth: 864px;
$time: 3000ms;
.reel_wrap {
position: absolute;
z-index: 99;
width: $reelWidth * 2 + $reelBgWidth;
height: $reelHeight;
background-color: #6f0b02;
box-sizing: border-box;
overflow: hidden;
&_finish {
.reel_l {
left: 0 !important;
transition: left $time ease-in-out;
}
.reel_bg {
width: $reelBgWidth !important;
left: $reelWidth !important;
transition: width $time ease-in-out, left $time ease-in-out;
}
}
.reel_l {
position: absolute;
z-index: 2;
left: $reelBgWidth;
width: $reelWidth;
height: $reelHeight;
background: url("../img/j1.png") 0 0 / 100% 100% no-repeat;
}
.reel_r {
position: absolute;
z-index: 2;
right: 0;
width: $reelWidth;
height: $reelHeight;
background: url("../img/j4.png") 0 0 / 100% 100% no-repeat;
}
.reel_bg {
position: absolute;
z-index: 11;
left: $reelWidth + $reelBgWidth;
width: 0;
height: $reelHeight;
background: url("../img/j5.png") right 0 no-repeat;
}
}
其他系列文章:
如果您觉得这篇文章有帮助,请点个赞吧~
相关文章
更多文章 →css2026-06-17
外阴影和内阴影介绍
在前端页面设计中,阴影是非常常见的视觉效果。它可以让元素看起来更有层次感,也可以用来表达悬浮、按压、凹陷、卡片、按钮等状态。 CSS 中最常用的阴影属性是 。它既可以实现外阴影,也可以实现内阴影。 一、什么是外阴影 外阴影指的是元素外部的阴影效果。 它会出现在元素边框之外,让元素看起来像是从页面中“浮起来”了一样。常见的卡片、弹窗、按钮悬浮效果,基本都会用到外阴影。 例如: 这个阴影表示:元素下方有一层柔和的黑色阴影,让卡片看起来更有立...
学习
css2026-05-15
border-image-slice详细介绍
是 CSS 系列属性里最关键、也最容易让人懵的一个属性。 它的作用可以简单理解为: 把一张图片切成九宫格,然后决定哪几块用来绘制元素的边框。 它通常和这些属性一起使用: 或者简写成: 其中 决定“怎么切图”。 一、 是什么? 普通的 只能画纯色边框: 但有时候我们想用图片作为边框,比如: 游戏按钮边框 像素风 UI 复古窗口 聊天气泡 卡牌边框 花纹装饰框 九宫格按钮背景 这时候就可以用 。 例如一张按钮图片长这样: 我们希望按钮变宽时...
学习
css2026-03-05
如何在最小副作用下创建 BFC
在 CSS 布局的江湖中, BFC (Block Formatting Context,块级格式化上下文) 是一个老生常谈却又至关重要的概念。无论是解决 高度塌陷 、 清除浮动 ,还是防止 垂直外边距重叠 ,BFC 都是我们的得力助手。 但是,创建 BFC 的方法有很多: 、 、 、 …… 哪种方法对现有布局的“破坏”最小? ❌ 过去的老方法 在过去,为了触发 BFC,我们不得不使用一些带有副作用的“黑客”技巧: : 元素会脱离文档流,...
学习
css2026-03-03
CSS过渡性能解析:transition: all
CSS过渡性能深度解析:为什么 可能是你页面的隐形杀手 一、引言:一个被忽视的性能陷阱 你是否曾在项目中这样写: 看似简洁优雅,却可能在低端设备上引发卡顿、掉帧。 真相 : 是前端性能优化中高频出现的“隐形陷阱”。本文将彻底揭开它的面纱。 二、核心概念: 到底在控制什么? 指定 哪些CSS属性变化时触发动画过渡 。它是过渡效果的“守门员”: | 值 | 含义 | 生成的CSS | | | | | | | 所有 可过渡属性变化时均触发动画...
学习
css2026-01-26
在CSS中,四种高度视口单位的区别
在CSS中,视口单位是构建响应式网页设计的重要工具,特别是针对移动端开发。除了传统的 ,CSS新引入了 、 和 等更精确的单位,解决传统单位在移动端的局限性。 四种高度视口单位的区别 | 单位 | 全称 | 含义 | 特点 | | | | | | | vh | Viewport Height | 传统视口高度单位,1vh = 视口高度的1% | 在移动端有问题:不考虑浏览器UI变化,经常导致内容被遮挡或出现意外滚动 | | svh |...
学习
css2025-11-04
keyframes 关键帧机制
一、什么是 @keyframes? 用于定义动画在不同时间点(关键帧)的样式变化;配合 属性应用到元素上。 定义动画 :使用 声明关键帧序列; 应用动画 :在选择器中通过 / 相关长属性控制表现。 二、基本语法 等价写法( / ): 三、与 属性配合使用 /相关长属性 | 属性名 | 含义 | 示例值 | | : | : | : | | | 动画名称 | | | | 持续时长 | 、 | | | 速度曲线 | / / / | | | 延...
学习
评论
请登录后发表评论
去登录